Applicable models:CL4NX/6NX Plus
Please refer to a below.
|
•
|
Use genuine SATO media and ribbons for the product, for optimum print quality.
|
|
•
|
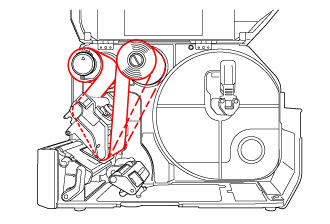
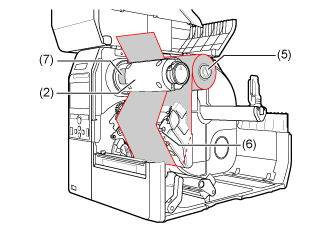
The routing path of the ribbon is shown in the below picture.
|

|
•
|
You can also refer to the sticker located on the inner side of the top cover.
|
View the video below for the procedure.
CL6NX Plus
|
|
|
•
|
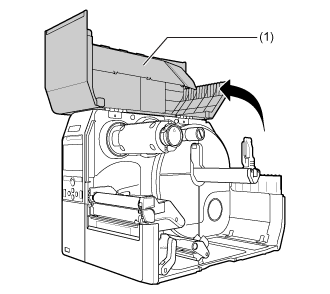
Open the top cover fully to prevent accidental drop of the cover.
|
|
|
2.
|
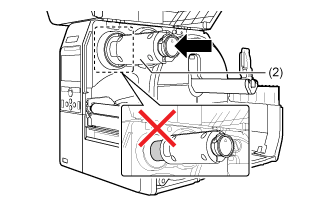
Push the ribbon rewind spindle (2) all the way in.
|
If there is any ribbon on the ribbon rewind spindle, remove it from the spindle before installing new ribbon.
|
3.
|
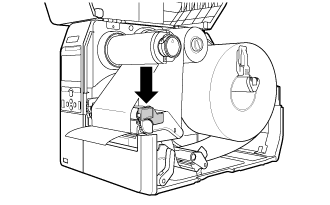
Push the head lock lever (3) towards the rear.
|
|
4.
|
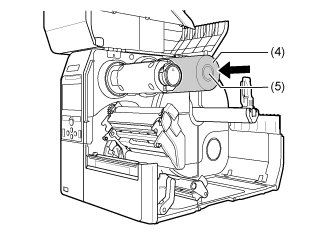
Load the ribbon (4) onto the ribbon supply spindle (5).
|
While taking note of the wind direction, insert the ribbon all the way in.
|
5.
|
From the ribbon supply spindle (5), pass the ribbon below the print head (6).
|
|
6.
|
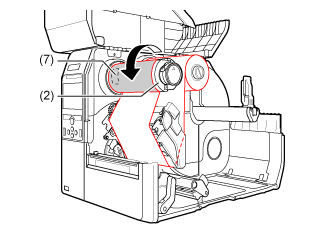
Wind the ribbon counterclockwise to the ribbon rewind spindle (2) and grip sheet (7).
|
Turn the ribbon rewind spindle counterclockwise for several rounds, to wind the ribbon.
|
7.
|
If the media is already loaded, press the print head down until the head lock lever is locked.
|
If the media is not loaded, load the media.

Comments
0 comments
Please sign in to leave a comment.