Problem/Question
Printouts are too light, too dark, or have streaks.
Applicable To
CL4NX Plus, CL6NX Plus
Resolution/Answer
Cleaning Using the Cleaning Kit
View the video here (it has no audio).
|
•
|
For CL4NX Plus
|
|
•
|
For CL6NX Plus
|
The cleaning procedure using the cleaning kit is as follows:
|
|
|
|
|
|
View the video below for the procedure.
CL4NX Plus
CL6NX Plus
|
1.
|
Make sure that the product is powered off, and disconnect the power cord from the AC outlet.
|
|
2.
|
Open the top cover.
|
|
|
|
|
3.
|
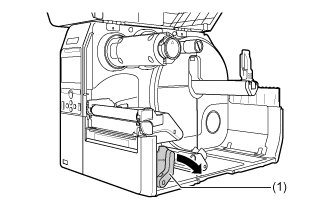
Push the head lock lever (1) towards the rear to unlock the print head.
|
|
|
|
|
4.
|
Remove the media and ribbon if they are already loaded.
|
|
5.
|
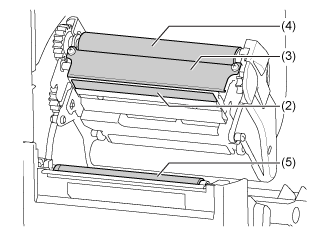
Clean the dirt on the print head (2), plate (3), ribbon roller (4) and platen roller (5) using a cotton cloth dabbed with cleaning liquid.
|
|
6.
|
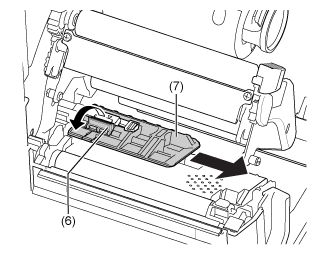
Tilt the sensor guide lock (6) down and pull out the media sensor guide (7).
|
|
7.
|
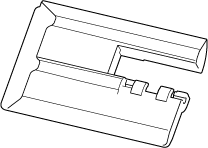
Clean the bottom of the media sensor guide using the cotton cloth dabbed with cleaning liquid.
|
|
8.
|
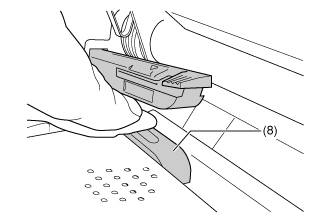
Clean the media sensor (8) using the cotton cloth dabbed with cleaning liquid.
|
|
9.
|
Return the media sensor guide to its original position and tilt the sensor guide lock up to the locked position.
|
|
10.
|
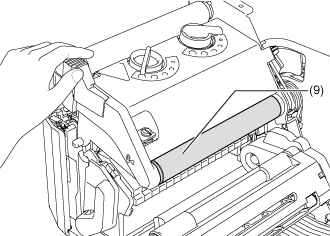
While holding the print head assembly with your hand, clean the shaft (9) using the cotton cloth dabbed with cleaning liquid.
|
After that, perform a test print with the product.
Check the print darkness and print speed. Set the print darkness and print speed correctly.
03-80223-EN
Comments
0 comments
Please sign in to leave a comment.